How to Edit YouTube Videos - Ultimate Beginner Guide 2024

Last Updated: Jun 07, 2023 - 5 min read

Can you edit a YouTube video? Do you know YouTube editing is rocket science? Do you think editing a video is only an editor’s job? If yes, we have something highly fascinating for you.
First, YouTube editing is not rocket science; even a novice can handle editing tasks easily. Second, ordinary people like you and I can edit a video nicely. Last, it is considered a skill everyone should learn because in current life situations, the economic crunch, and whatnot, we must invest money in the right place.
So, keeping all that in mind, we have sorted out how to help you learn the art of editing a video. With that, we have mentioned the basics of YouTube editing as well.
What is covered in this blog? Let’s check it out.
How To Edit YouTube Videos?
Here, you will learn editing videos on different systems and devices. Whether you're a seasoned smartphone whiz or a desktop editing ninja, this guide unveils the secrets to crafting captivating content across all platforms.
1.1 Modify Youtube Videos On Desktop
Usually, desktops are used to edit a video after the shoot is completed. For that, you have to follow the steps mentioned below.
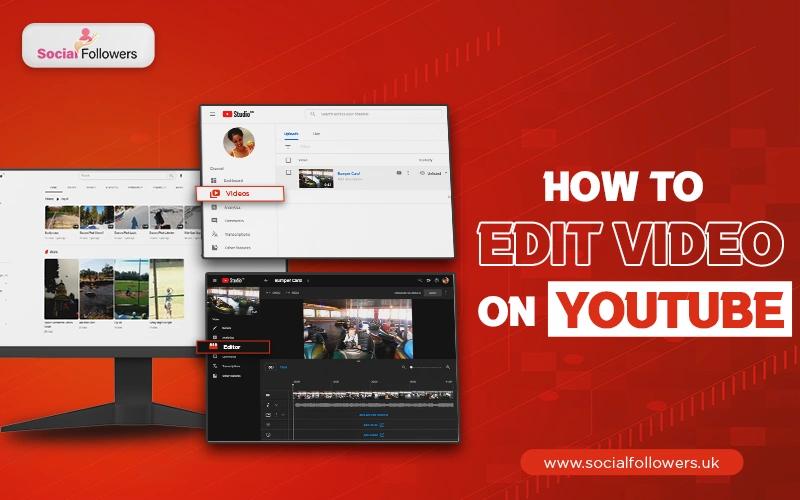
Step #1: Go to your channel dashboard. To use the “YouTube Video Editing app”, you need to sign in first.
Step #2: Then you have to click the “upload videos” option.
Step #3: Select the video you need to edit from the files on your computer.
Step #4: Add the details such as the title, description, thumbnail for the video, playlist to add
the video in, and so on.
Step #5: Go to the Visibility page to select who can watch your video. You can either select the public, private, or unlisted option.
Step #6: Select the option of scheduling the date and time of posting the video.
Step #7: In the end, you need to click the save button.
1.2 How To Use Youtube’s Built-in Video Editor?
Using a YouTube video editor is a must to get the complete set of features required to create quality content for YouTube. Below are the steps to trim the video in the YouTube video editor.
Step #1: Click the Editor option on the left column.
Step #2: Click the Get Started button in the center of your screen.
Step #3: Select the topmost Trim option.
Step #4: Drag the bars to the starting and ending point of your video on the timeline that appears at the bottom of your screen.
Step #5: Click the Preview option to see the result after the trimming.
Step #6: Save the video if you are satisfied with the result.
1.3 Trimming a YouTube Video with Video Editor
You can also trim a part out of the video from anywhere. There are four simple steps to follow for that.
Step #1: Bring the starting point to where you want to trim the part from.
Step #2: Click Split from the bottom of the screen.
Step #3: Drag the bar to the endpoint that you want to exclude from your video.
Step #4: Click Save.
1.4 Blurring a Video Using Youtube Video Editor
There are several third-party YouTube editing apps that help in completing the rigorous process of editing. Most of these apps have the option to blur. When you click “blur” in the YouTube editing application, you will get surprised. It offers more than one kind of blurring feature. You can either choose the face blur or custom blur options. The face blur feature detects all the faces in the video on its own and you can select which one of the faces you want to blur.
The custom blur, on the other side, lets you select the time, location, and size of the blur box which will be blurred during the video. Don’t forget to save the video once you are done. To get desired results, you have to follow a unique set of instructions for that particular application.
1.5 Using Youtube’s Video Editor To Add Music
You can also add music or sound effects to your video using the YouTube Video Editor. Just follow these simple steps.
Step #1: Click the Editing Screen
Step #2: Select Audio.
Step #3: Hover over the song or sound effect and Click Add
You can find a wide list of songs and sound effects which don’t have copyrights. You can use them easily for your videos. By clicking add, the song will become visible by the side of the timeline of your video.
YouTube video editor applications are available on both iOS and Android. Professional editors however use premium versions and novice editors use free versions of the apps. Nonetheless, it works out best for all types of YouTubers.
2. Editing YouTube Videos on Phone or Tablet
Using a desktop or a laptop for editing is indeed more professional, but you can edit Youtube Videos using a smartphone or a tablet. However, the features and options will be further limited.
There is one way to improve your user experience manifolds and that is by downloading Youtube Studio from Google Play or Apple App Store. It provides you the luxury of accessing the analytics of your videos and doing better settings. YouTube Studio helps you plan your future videos and schedule them better in light of the performance of past videos.
3. Trim YouTube Videos on iOS Products
Are you an iOS device user? We have good news for you. There is a built-in video editor in the photos application of the device. It offers a very convenient way to edit YouTube videos. Open the video and click the edit option from the top of the screen. It will open all the editing options for you.
You can drag the ends of the video from the bottom part of the screen for trimming purposes. The adjust icon option allows you to change the contrast, brightness, and exposure of the video as per your requirement.
To add a filter of your choice, you have the filter option, and also there is a crop and rotate option if you want to crop any part of your video. Click done when you are done editing.
4. Edit YouTube Videos on Android Smartphones
If you want to edit YouTube videos on an Android smartphone, please know that the editing feature is accessed from the built-in Google Photos app. These apps offer limited editing features to trim the videos that you have recorded using your Android device.
Click on the Edit icon after opening the Google Photos App on your Android smartphone. Just drag the ends on either side of the video to adjust the start and end points, effortlessly trimming away unwanted bits.
This simple trick lets you quickly remove shaky beginnings, awkward pauses, or unnecessary sections - a crucial first step in crafting a polished YouTube video. But Google Photos offers more than just basic trimming. Dive deeper by tapping the "Tools" icon, where you'll find speed adjustments, filters, and even basic text overlays. While it may not match the power of a dedicated editing app, Google Photos provides a surprisingly handy toolkit for on-the-go edits, perfect for crafting those Instagram-worthy moments into YouTube-ready gems.
5. Frequently Asked Questions
a) Why is it necessary to make backups?
It is very crucial to always make a backup of your video. You never know when you may lose all your data during editing, or copying your video from your phone or any other device to your computer.
b) What’s the use of an end-screen?
An end screen can be a great way of engaging with your audience. You can ask them to subscribe to your channel or just show them your channel logo, it can make them reconnect to you at the very end.
c) Do I need a mic to record the audio?
Yes, even if the built-in mic of your phone is of good quality, it is a professional and proper approach to have an external mic for the audio.
A Couple of Significant Takeaways
Most professional video editors use Adobe Premiere Pro and Final Cut Pro for editing their videos. If you are a beginner content creator, YouTube’s editor is more than enough for you. As you will grow in stature, you will need a third-party application to have access to more advanced features. If you want to clip your YouTube videos efficiently, third-party applications like Adobe Premiere Pro and Final Cut Pro offer advanced features for professional editing.

Whether you’re an influencer, business, or just getting started, we make it simple to increase your presence online. Get started today and see the difference in your reach and reputation.


